Flores and Pico Azores: Best Photo Spots and 5 Day Itinerary
- Patrice Gagnon
- Aug 12, 2025
- 9 min read
Flores & Pico Photographer’s Itinerary: a day-by-day guide for capturing the Azores’ most dramatic waterfalls, crater lakes, lava-framed vineyards and whale-filled seas. Includes precise shooting times, gear tips and map links; everything you need for gallery-ready images and worry-free travel. Table of Contents
Logistics at a Glance
Azorean shoots are all about timing the weather and moving fast between islands. Air hops are simplest if you fly into Ponta Delgada PDL, connect to Flores FLW or Faial HOR, then continue to Pico PIX. Ferries are your friend in the central group, especially Faial ⇄ Pico in about 30 minutes, which is perfect for golden-hour shuffles. Car rental is essential on both islands, automatics sell out in summer, and Flores stations sometimes keep odd hours, so top up early.
Best light tracks with Atlantic squalls. May and June bring full waterfalls and fresh greens, September often delivers cleaner air for night sky and long-range volcano views. Basecamps that work for photographers are Fajã Grande on Flores for walkable sunsets and Madalena or Lajido on Pico for quick access to vineyards, whale docks and Lagoa do Capitão.
Practical Tips
• Build a 24 hour buffer for Flores flights. Weather can ground small planes.
• Book automatics six weeks out. Keep a paper copy of your reservation.
• Refuel nightly on Flores. The small pump near the airport sometimes closes midday.
• Monday restaurant closures are common on Pico. Check hours before you plan a post-sunset meal.
Gear & Settings Cheat-Sheet

Travel light but cover the range. Ultra-wide zoom 14–24 mm for waterfalls and night, 24–70 mm as your storytelling workhorse, 70–200 or 100–400 mm for cliffs, whales and compressed crater layers.
A carbon travel tripod keeps long exposures sharp, and a CPL + 6 and 10 stop ND + 3 stop soft grad will tame glare and balance sky.
A sub-250 g drone is perfect for crater geometry and coastline patterns without drawing attention.
Go-to recipes that rarely miss:
Waterfall silk in overcast, 0.8–1.6 s, f/11, ISO 64–100, CPL on, soft 3 stop grad if the sky sneaks in.
Blue-hour harbor frames, 30 s, f/8, ISO 100, manual WB near 4000 K for true twilight.
Whale breach from a Zodiac, 1/2000 s, f/5.6, Auto ISO cap 3200, AF-C, high burst.
Drone sunset at 100–120 m, 1/800 s, f/2.8, ISO 100, AEB ±0.7 EV for gentle HDR merge.
Practical Tips
Two bodies beat one in salt spray. Keep wide on body A, tele on body B to avoid swaps.
Hand-launch drones on cliff pull-outs. Flat pads are rare.
Power math for a long day: 3 camera batteries plus 2 drone batteries usually equals 600 stills and 12–15 flights.
Back up in threes each night: card to SSD to cloud. Most stays have 50 Mbps or better.
Day 1 – Flores West Coast Waterfalls
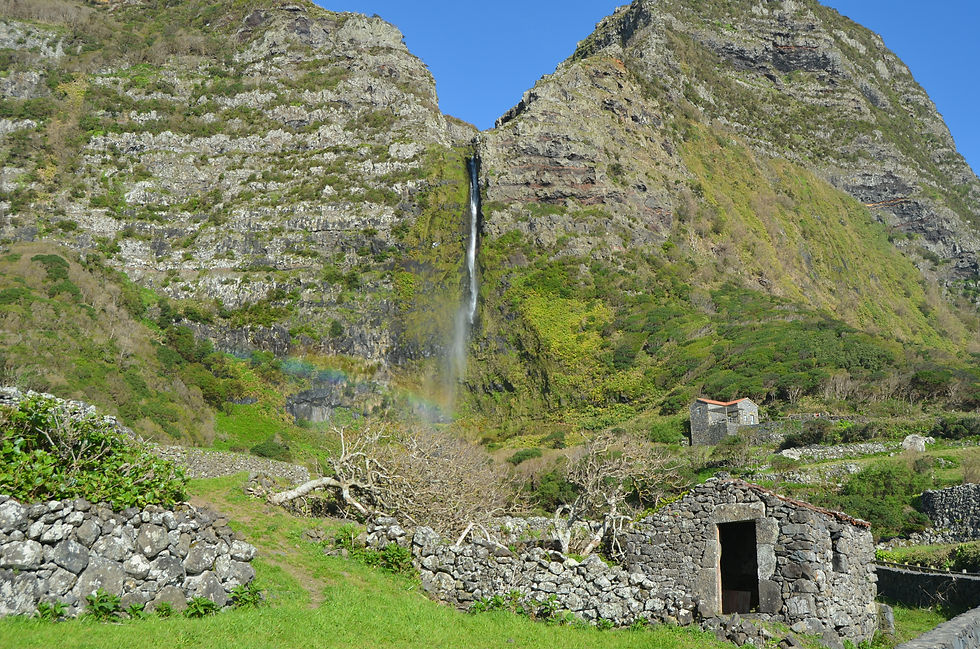
Flores greets you with vertical drama. From Santa Cruz the road climbs into cloud, then drops you into Fajã Grande, a thin green apron at the foot of waterfall cliffs. By late afternoon the sun swings under the cloud deck and turns every cascade to amber thread.
This is where you start.
Park at the signed lay-by and walk two minutes to the plunge pool. Best light lands in the last 45 minutes before sunset when spray catches color. Compose low using the rock ledge for scale, then step back for a vertical that keeps the full drop clean. Lens and settings that work here: 16–20 mm, f/11, 0.6–1.3 s, ISO 64–100, CPL plus a soft 3 stop grad for the sky.
Why it belongs in your set: Bacalhau is Flores’ signature opener, the print that stops a scroll and sets the tone for the island.
Practical Tips
Gorge winds shake tripods. Hang a small weight from the hook.
Hand-launch drones from the flat rock bench to the left, not beside the pool.
Dinner is a reservation at Maresia in Fajã Grande. Fixed menu, seafood forward, last orders around 22. Book before you leave the falls.
If clouds smother the cliff, pivot to Miradouro do Portal for a sunset telephoto of roofs and multiple falls.
This day was kind of short for me, which is why there's not much meat, I'm assuming you'll get here late with all the airport transfers.
Day 2 – Craters, Lagoons and Central Highlands

Dawn belongs to altitude. Roll by 05:45 and crest the plateau as first glow brushes the crater rims. Best light is the first 30 minutes after sunrise when low cloud drapes the bowls and the water holds a perfect mirror. From the Lagoas Rasa e Funda pull-off, stroll a short path to a basalt podium. Compose at roughly 35 mm to hold both lagoons without stretching edges. Settings that stick the landing: f/8, 1/5 s, ISO 100, bracket ±1 EV for sky detail, soft 2 stop grad if cloud thins. Why it matters: a two-lake frame shows Flores’ volcanic diversity at a glance and answers the “Flores crater lakes” search intent elegantly.
Five minutes west, Lagoa Negra and Lagoa Comprida reward a slower eye. Switch to 70–200 mm for layered abstracts of reeds, tree silhouettes and water-fern patterns. When the plateau socks in, drop to the coast at Baía da Alagoa and work rock stacks in gentle surf with a 16–20 mm low angle and a half second shutter.
Late morning, walk the farm track to Poço da Ribeira do Ferreiro. Best light is often mid-morning when mist lingers and diffuses highlights. Compose wide at 18–20 mm to hold the entire cascade amphitheatre, then build a vertical that uses the pond edge as a lead-in. Settings: f/11, about 0.6 s, ISO 64, CPL at 45 degrees to cut leaf glare. Why it belongs: this is your hero spread for Flores, the banner that sells prints and anchors your social card.
Practical Tips
EN2-2 is narrow with blind bends. Use pull-outs and yield to farm pickups.
Coach groups reach the Ribeira do Ferreiro pond around 10:30. Beat them or wait them out at lunch.
Drones are not permitted inside the protected Ribeira do Ferreiro zone.
For a casual bite or drink, Barraca Q’abana by the natural pools is the easy option. Keep Maresia for the set dinner.
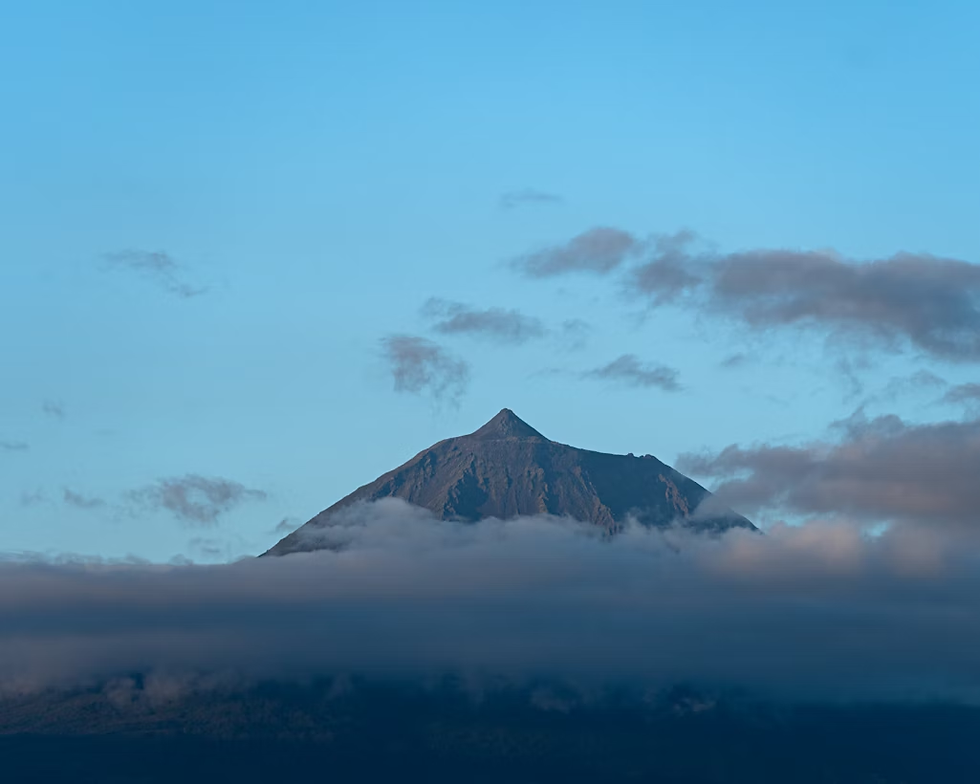
Day 3 – Hop to Pico, Whales and Volcano Reflections

Trade waterfalls for water columns. Fly or ferry toward Madalena, and by midday the charcoal triangle of Pico dominates the skyline. Start in Lajes do Pico at the working harbor.
Best light is early, side-skimming faces and nets hung to dry on basalt. Compose tight on hands, cork floats, sun-bleached jerseys, then step back for a portrait with the chapel and boats. Settings for clean candid motion: 35 mm prime, f/2.8, 1/1000 s, ISO as needed. Why it belongs: human scale between the landscape icons keeps the story honest.
At 14:00 suit up for a whale-watching zodiac. Vigias call positions from the cliffs, the skipper idles at distance, and the moment a tail rises the volcano often sits in the background like a theater backdrop. Seat choice starboard aft helps line the cone behind the action. Settings that bank the shot: 70–200 mm near 200 mm, 1/2500 s, f/5.6, Auto ISO cap 3200, AF-C, burst high. Why it belongs: “whale plus volcano” is Pico’s postcard and your lead social asset.
Finish high with Lagoa do Capitão at sunset. Best light is after 19:00 when day trippers leave and the summit blushes. Compose low to float reeds across the foreground and hold the volcano reflection centered but relaxed. Settings: 16–35 mm around 24 mm, f/11, quarter second, ISO 64, add a 6 stop ND if clouds are streaky. Why it belongs: symmetry sells prints and anchors your Pico chapter opener.
Practical Tips
Strap your camera to your wrist on the zodiac. 25 to 30 knots is normal.
I recommend dinner at Mar Sushi Terrace in Madalena before blue hour or post-sunset. Reserve ahead.
Back up cards as soon as you return. Night sky is possible if the peak clears.
Day 4 – UNESCO Vineyards, Madalena Lunch, Wine and Blue Hour Coast
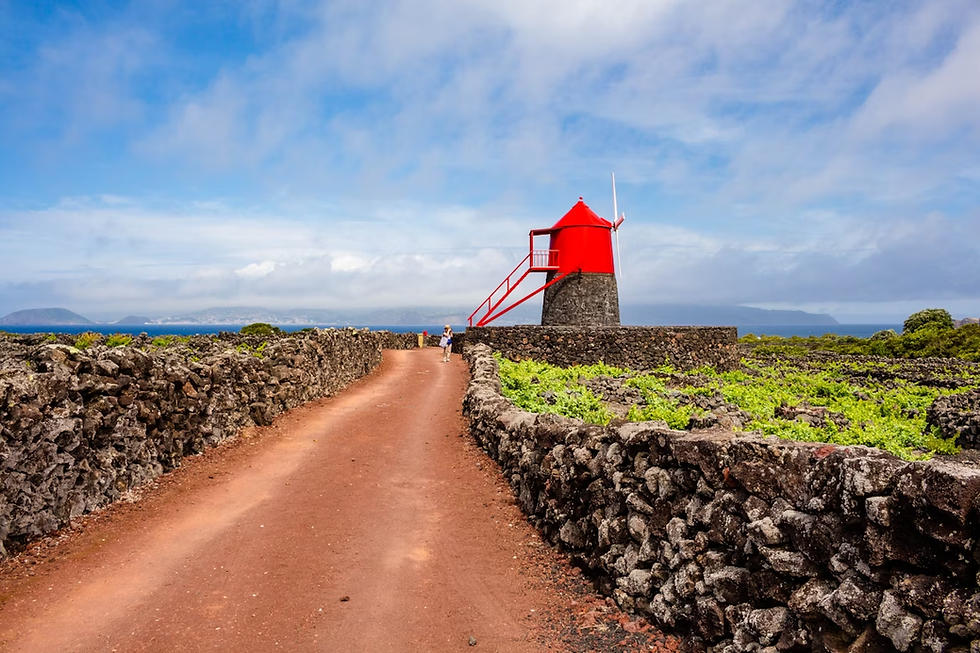
Morning belongs to the mountain, afternoon to rock and vine. The Criação Velha lava fields read like a honeycomb from above, thousands of knee-high basalt walls that shelter stubby vines from wind and salt. Park by Moinho do Frade and walk the signed paths. Best light is 16:30 to 19:30 when the walls glow warm and the cone often peeks clear. Compose low so wall tops form a zigzag foreground, then step up by the windmill for a classic three-layer frame of currals, windmill and volcano. Lens and settings: 24–70 mm for leading lines, 16–35 mm for the full grid, CPL at half strength to tame leaf glare without killing lava sheen. Why it belongs: this is Pico’s visual identity and the UNESCO anchor your readers search for.
Break in Madalena for a light lunch and a quick harbor wander so you are nimble for the vineyards. Drift inland to Terra do Pão for a clean meadow-to-mountain compression. Lens 70–200 mm around 100–150 mm, settings f/5.6 and 1/500 s to hold waving grass. Why it belongs: simple layers that pair well with the vineyard geometry.
Book a tasting at Azores Wine Company or Adega Vitivinícola Lucas Lopes Amaral. Photograph details, not just glasses. Compose on hands pouring verdelho, basalt meeting stainless steel, window light on labels. Lens 35 mm prime at f/2.8 keeps it intimate. Why it belongs: craft and culture complete the Pico story and answer “Pico wine tasting” intent.
Blue hour is for lava coast long exposures a few minutes west of Madalena. Best light is the first 20 minutes after sunset. Compose with a low tripod, surf lines leading to the last glow. Settings: 30 s, f/8, ISO 100, manual WB near 4000 K. Why it belongs: the day began with texture and ends with mood, a clean arc for the article layout.
Practical Tips
Never climb the vineyard walls. Stay on paths and rock verges.
Tastings run 45 to 60 minutes.
Roads are dark after dinner. Keep a headlamp and microfiber in the door pocket.
Salt spray travels. Wipe your front element every few frames and bag gear before you open the car door.
Day 5 – Night Sky Window, East-Island Loop, Quiet Sunset

If the peak clears overnight, set an early alarm. Best light for astro is the hour before nautical dawn when the Milky Way tilts clean above the cone. Compose low so the reed fringe anchors your foreground and use a second, shorter exposure to tame the volcano’s silhouette. Settings that print well: 14–20 mm, f/1.8–2.8, 13–20 s, ISO 3200–6400, then blend a shorter 4–8 s frame for the reflection. Why it belongs: this is your portfolio keeper from Pico, the frame that feels impossible anywhere else.
Late morning, run the east-island loop. The road threads past Calheta de Nesquim, Piedade and Prainha with small harbors and basalt ramps that invite abstracts. Best light is soft overcast or high noon with thin haze that turns wet rock into a charcoal canvas. Compose tight on slipways, chains, and foam patterns; then switch to 100–200 mm for compressed layers of village, pasture and cone when it peeks out. If wind lifts, detour to Terra Alta for a quick, high viewpoint that reads clean in telephoto.
Afternoon warms the black rock at Poça das Mujas. Compose from the walkway with a mid-range to hold pool geometry and open Atlantic. Settings for motion without mush: 1/5 to 1/2 s at f/11, ISO 64–100, CPL off to keep the lava sheen alive. Why it belongs: a human-scale coastal scene to balance your wild lava and vineyard work.
Save your last golden hour for whichever of Lagoa do Capitão, Criação Velha, or the Lajes coastline you want another crack at. The light shifts fast on Pico; a second attempt often rewards you with a clean summit or calmer surface. Compose with intent to complete the story you want to tell in your gallery: symmetry at the lake, geometry in the vines, or mood on the coast.
Practical Tips
For astro, bring a red-light headlamp and pre-focus at dusk on a distant ridge, then tape the ring.
Check SpotAzores webcams before committing to the lake at night. Cloud bands move in stripes here.
Natural pools can be slick. Keep a microfiber handy and wipe fronts every few frames.
East-island cafés close mid-afternoon. Carry water and a snack so you can keep chasing light.
Practical Photography Map
Everything above drops neatly onto a single map layer so you can chase light instead of pins. I’ll package the locations in a KML/GPX with short notes like “tripod-friendly,” “drone no-fly,” and “best hour.” You can load it into Google Maps, Gaia GPS or Maps.me for offline use.
A Gentle Nudge Before You Go
If this itinerary helps you bring home frames you are proud of, take a minute to browse the Flores and Pico fine-art prints on Traveling for Photography or reach out for a custom commercial brief while the light and logistics are fresh. If you want company in the field next time, join the mailing list for workshop dates and gear deep dives.


Comments